
 It's been a year since my first real attempt at building a model from scratch. Not only was I inexperienced in many of the methods required, but it was also a much bigger scale than I was used to dealing with. My build of the Normandy SR1 from Mass Effect ended up being a great learning experience, although it was not without its problems and mistakes.
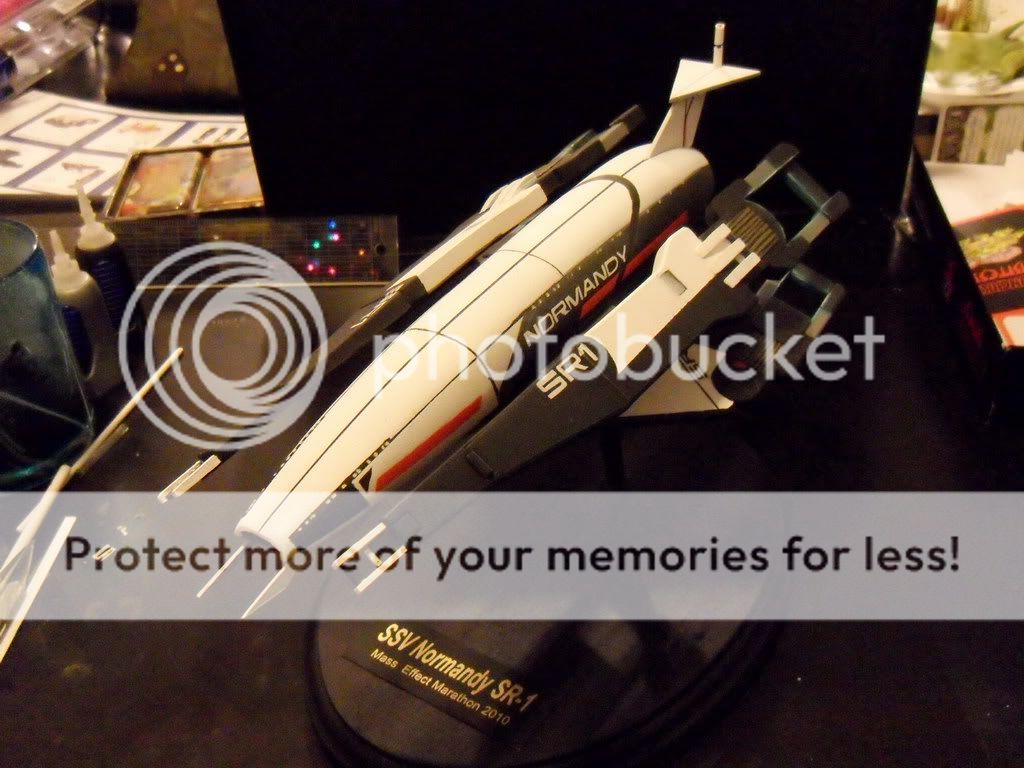
It was created for the G33kwatch Mass Effect Marathon, where it was auctioned off for a good sum! All proceeds went to the Childsplay Charity, which helps children in hospitals to have toys and games.
This will be the second year of the MEM, and so I am back in action making the Normandy SR2! Just as in game, this build will be bigger and better than its predecessor. I've already spent a good amount of time working on this, but the results have been pretty lackluster until recently.
I've decided to write down my experience so far to both give you a preview of whats to come, and also to provide any tips and lessons learned along the way. If you just want to skip to the good stuff, pictures of the current build state are at the bottom. :)
______________________________________________
PlanningI began by looking at my build from the previous year and identifying the major mistakes that I wanted to avoid this year.
Major failings of last year's build
- Incorrect source material - The 3d model I obtained for the SR1 was very convenient at the time of planning, but I learned too late of quite a few incorrect portions of it. They were nothing too major, but the discovery when the project was already too far along was demoralizing all the same.
- Haphazard materials and planning - I was able to make schematics from my 3D model as planned, but my methods of transferring to plasticard and choice of materials really came back to hurt me during the assembly phase. I was not confident in making perfect cuts, so I tried having balsa wood cores with plasticard encasing. Not taking plasticard thicknesses into account made measurements off. Also, use of Google Sketchup to get proper measurements gave poor results and kept me constantly adjusting on the fly.
- Making molds and resin a priority - This was an interesting learning experience and half worked. I was hoping to be able to make a few clones of pieces and extras in case I broke parts. The molds worked out, but the resin gave me many troubles. I was forced to resort to dental plaster instead of the resin. This was not an optimal medium for a large ship, and added much more time to the build on top of the time already spent on making my first set of molds.
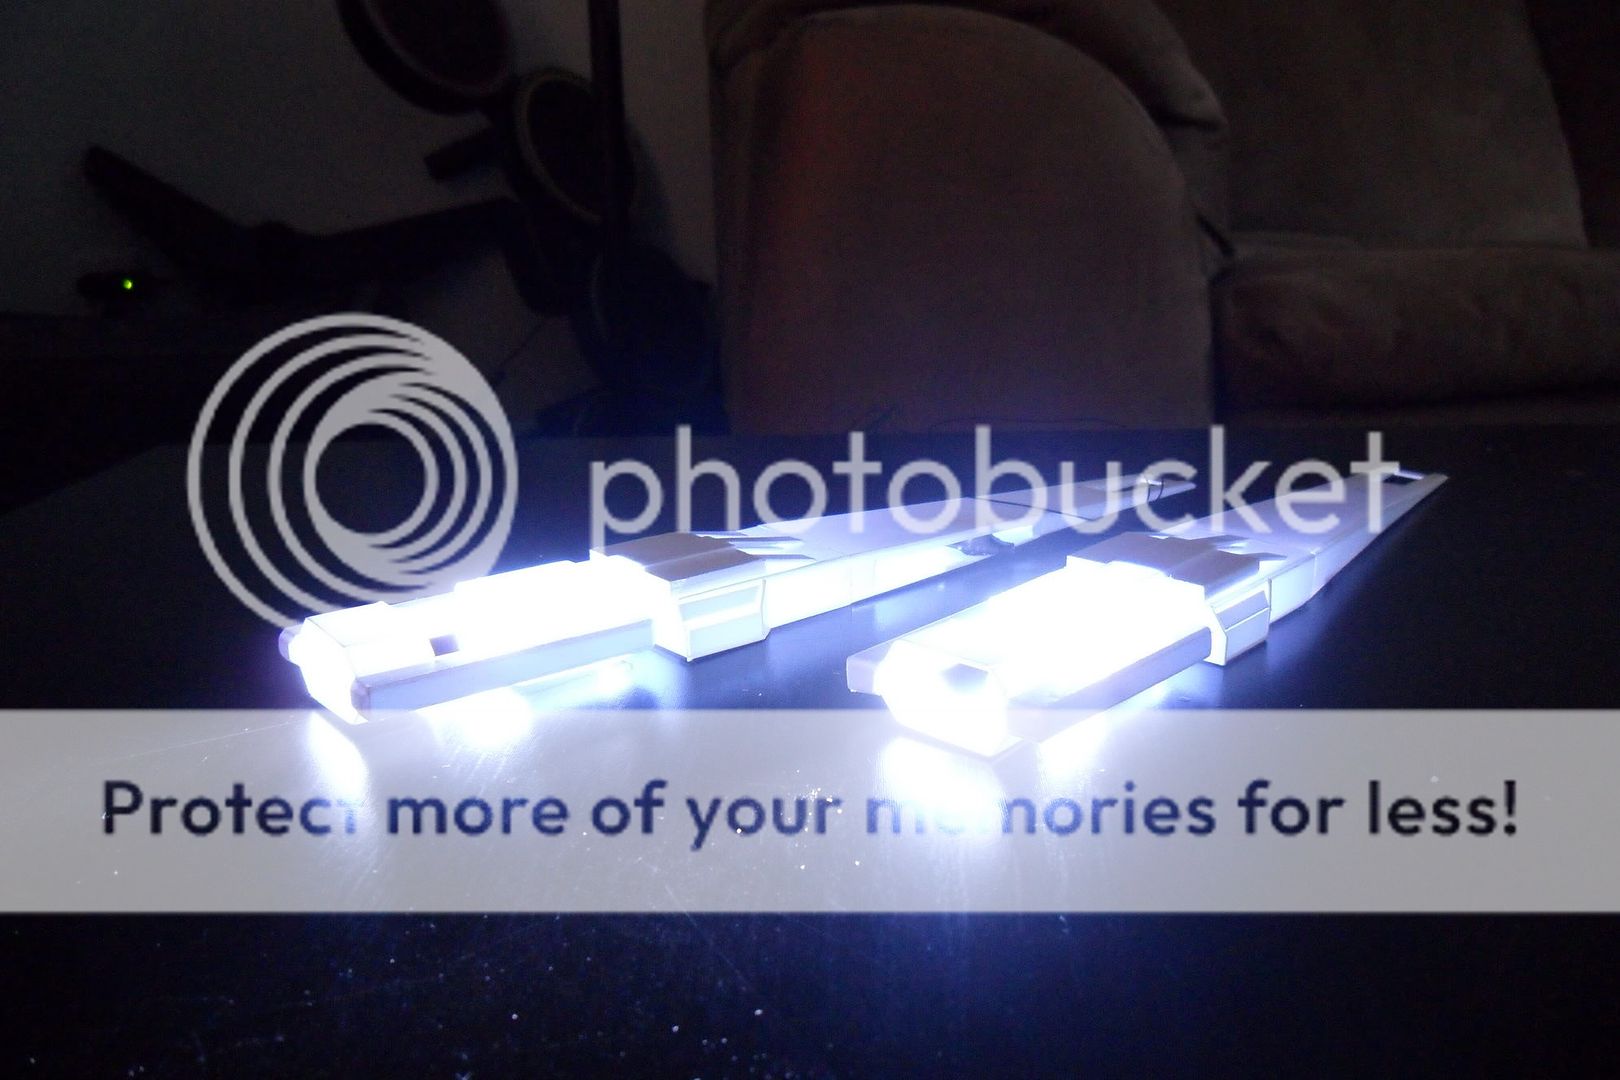
So I decided to try to plan out much more of my build beforehand, and stick with methods that I was confident in. I dropped any notion of mold-making, but I felt comfortable enough to add LED's into it.
With this in mind, I scoured the net for source materials. Pictures, models, in game screenshots.. In the end I settled on an amazing 3D model made by Thorreign (Matt/Mathias). The quality and detail are top notch, and I knew I would be in a good state working off this model.

I picked up an Autocad program and determined my scale of choice. This was done partially just through experimentation, and I finally chose a size which would make the model a bit under 2 feet long. This was almost twice as large as the SR1, but I felt the build deserved it.
I spent a few weeks isolating individual parts and generating views from different angles. After that, it was a matter of manually measuring every piece I would need. You can see this in all of my chicken scratch on some of the sheets.

At this point I needed to focus on amassing the proper materials. After looking at my current supply of plasticard, I decided on a 1/32 thickness for the majority of the build, and a 1/16 for certain parts that might need a more sturdy join, like the hull frame. I also picked up some 1/64 clear plastic for the light emitting sections, and tubing for joints and the stand. I threw in some strips of common sizes that would save me some cutting time.
For LED's, I went through Evan Designs, my regular source for ready-made LED's. For single builds, having everything assembled really helps cut out some time on lighting.
Not shown is my resin clay, which I used last year for the hull and will be using again. More on that at a later date.

I decided to upgrade my tools for this build as well. In particular, the repeat cutter has proven invaluable. It allows me to measure out a particular dimension, lock it in, and then cut as many pieces to that dimension as needed. The original stopper was a bit askew on the sides, so I refitted it with a right angle ruler to ensure I was always getting 90 degree cuts.
The smaller hobby ruler has been very helpful due to the quick sizing sections, and the larger clear ruler has a steel side for actual cutting.
I've switched to plastic cement over super glue for my plasticard joins, as it actually melts the plastic for a more cohesive bond.
Also shown painters tape, sandpaper, and many sharp blades are a must for plasticard work.
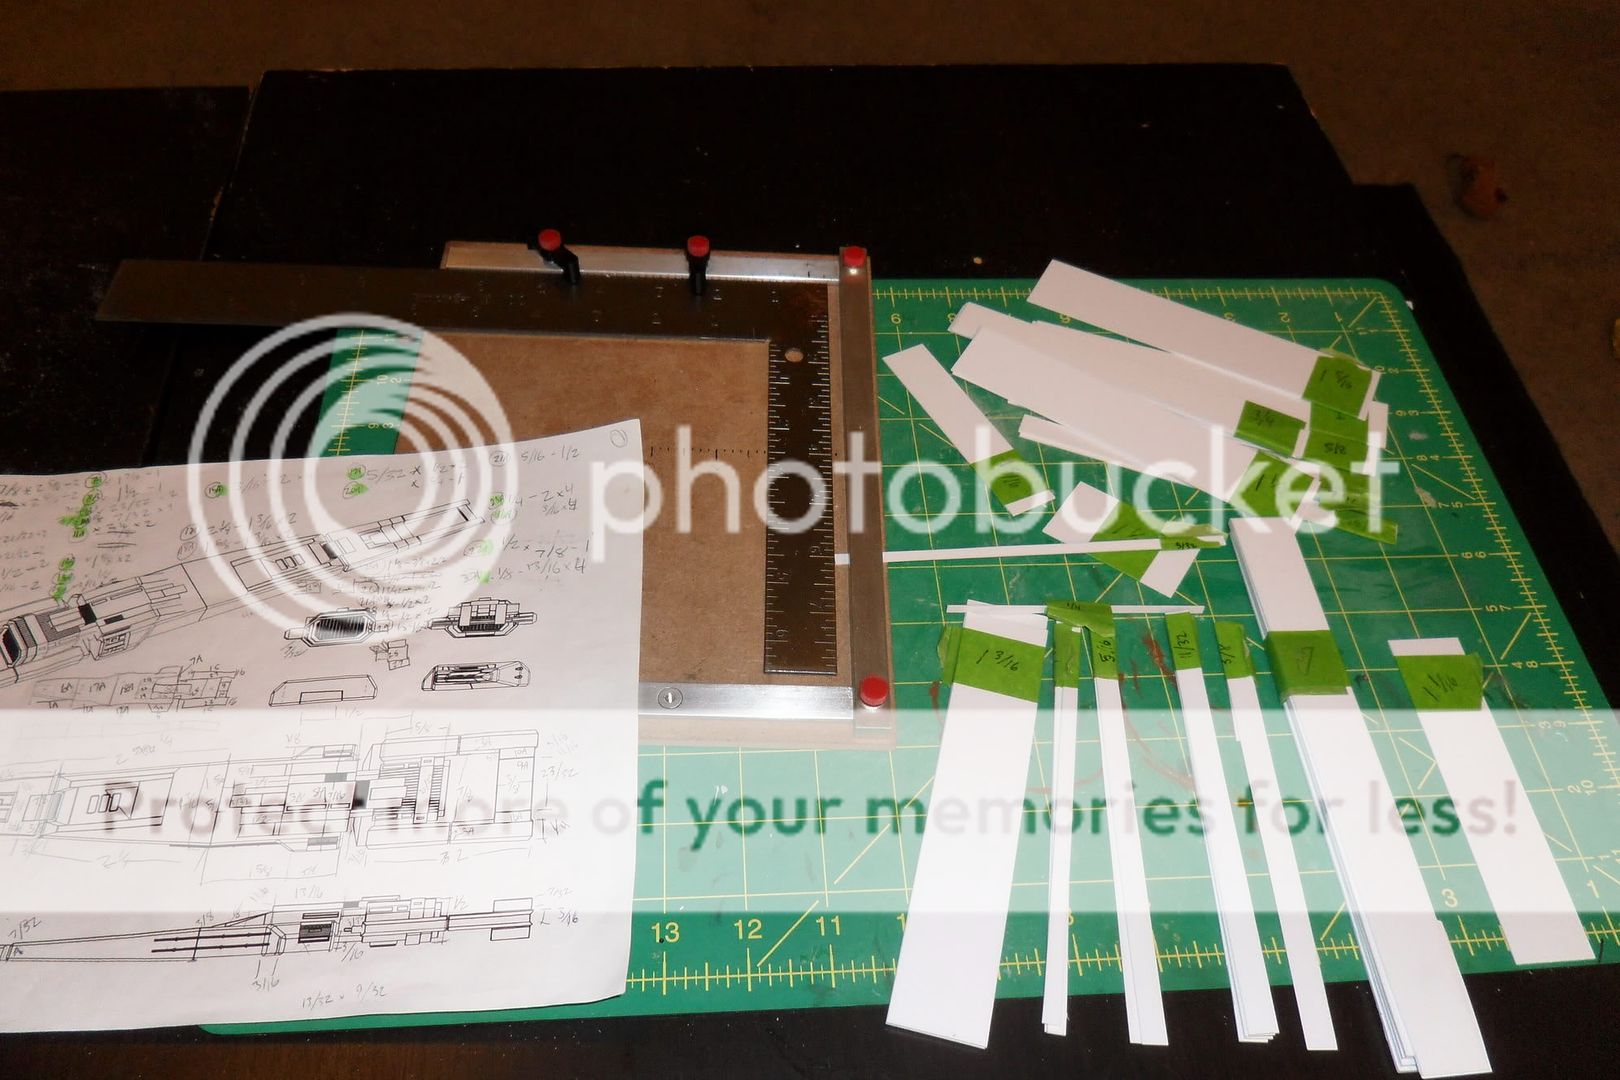
With the plans and materials available, I took the time-consuming step of categorizing everything into like widths, and cutting strips of each. This looks boring, and it pretty much is. But it was also something I could do while away from my home workspace, so I took advantage of what I could do and got it done.
I then cut all of the pieces for each individual part and bagged them up so that I could assemble them when I had the time.

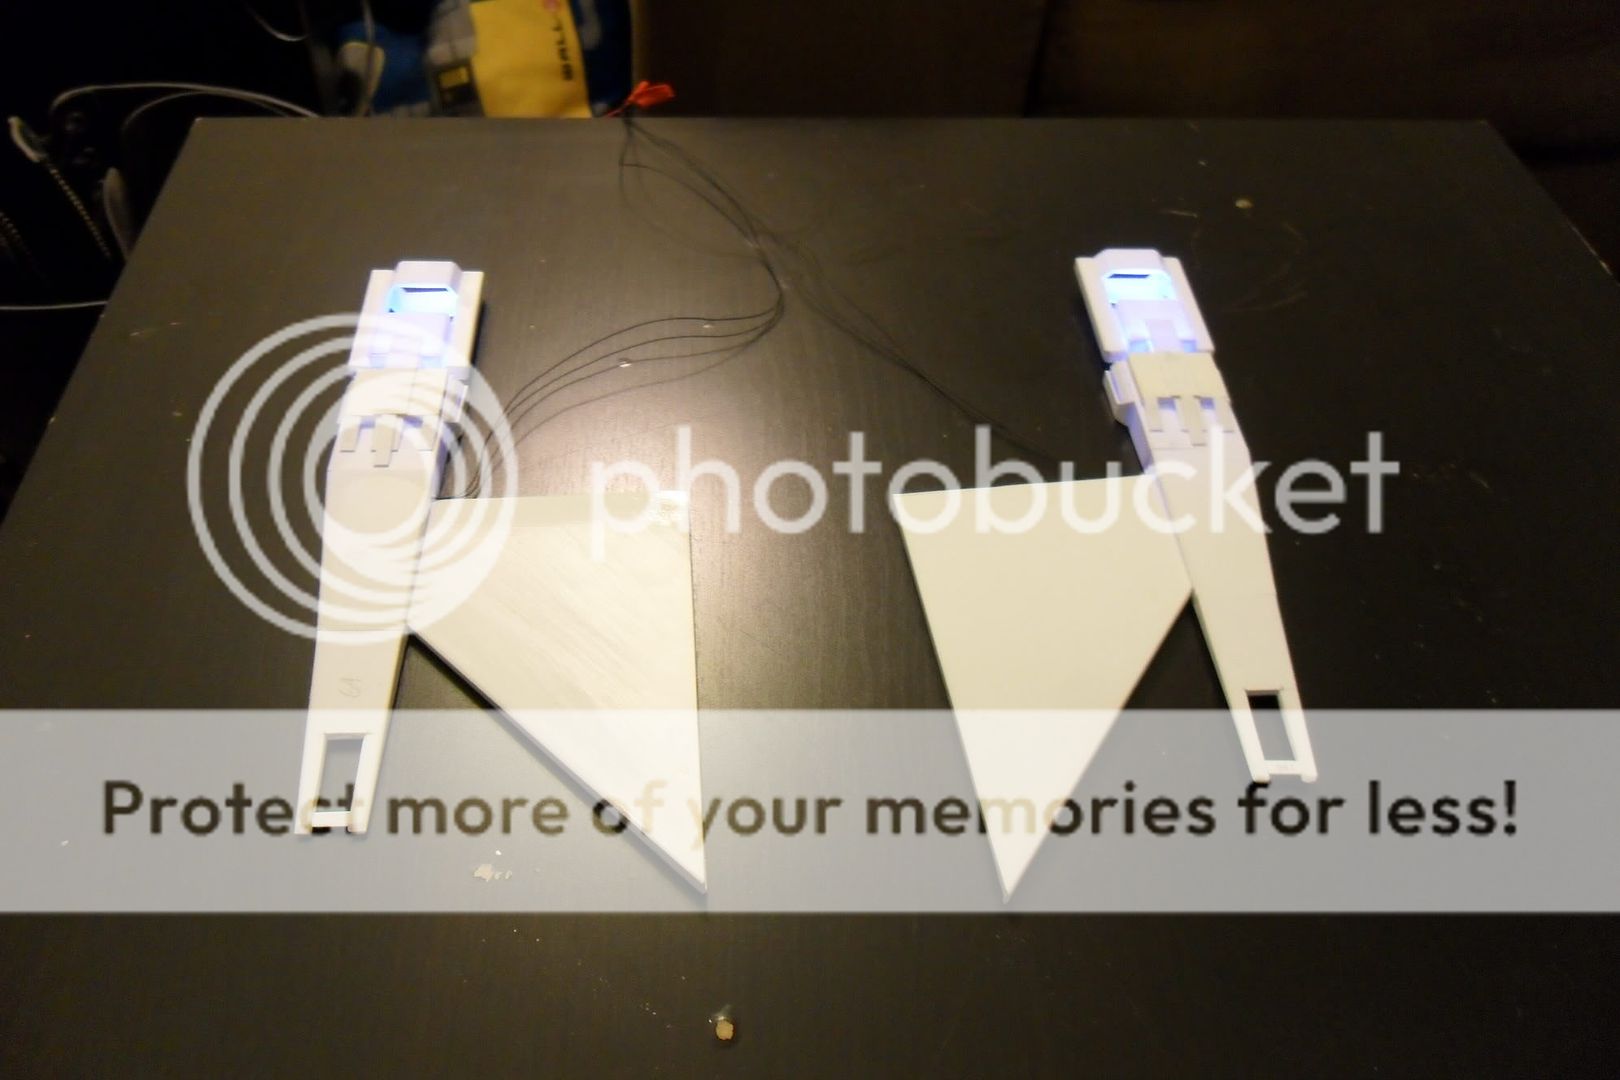
This weekend allowed me to follow through on my goal of a high-planning approach. I took my prepared materials and plans for the lower thrusters and wing assemblies, and put everything together. Not everything was exactly correct and I had to make quite a few new pieces that I missed, but on the whole it worked out spectacularly.
I am very pleased with the speed at which these got completed. You can see the completed thrusters next to their schematics, and the pile of the next set of thrusters awaiting construction.

And now what you were actually looking for in this post, the pics! Here they are all test lighted up. I wasn't originally going to do the LED's just yet, but the way the assembly came together they needed to go in.

______________________________________________


.jpeg)


