
I use P3 red ink, and Vallejo sun yellow and white.
I start with basic black primed or dark dry-brushed jump pack thrusters. I work on them in sets so I can maximize painting while others dry.

I start with a big blob of white in the two source parts of each thruster. I often have a huge crack there, so I will add thick white layers over the course of painting to fill it up. These will be my light source. I then take thinned whites and edge all the hard corners and lines that would face these white light sources. This needs a brush with a well kept point, but uses the paint on the edge of the brush. If you are not used to this method, take some scrap minis to try it on. Having the right amount of thinned paint on the brush will help immensely, so I usually wipe the first stroke on my thumbnail (subsequently I often end a paint session with a Jackson Pollock on my thumb)
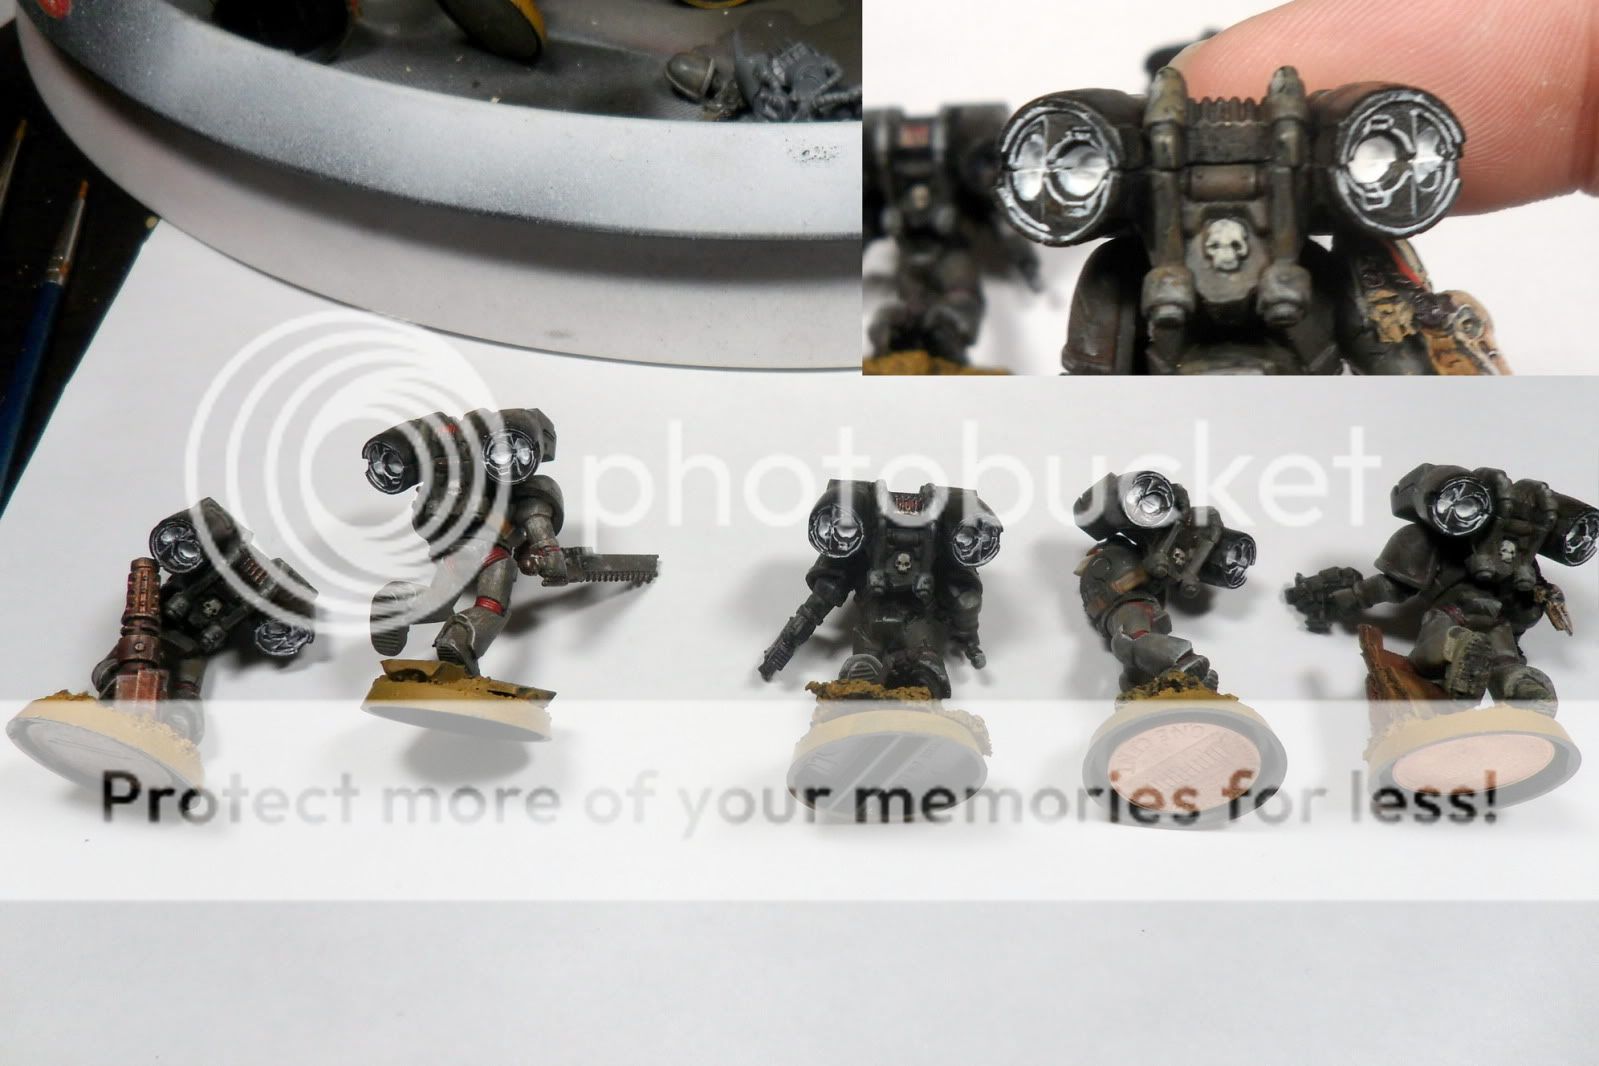
Next I do the same thing with a thinned Sunburst Yellow, leaving white at the source dots. Well thinned paint helps again. Too watery and it will run into crevices, and too dry and you will be dry-brushing a yellow that isn't as striking.

I cover everything in a thin layer of red ink, leave the white sources if you can, otherwise touch it up at the end. This gives everything a good heated area look.
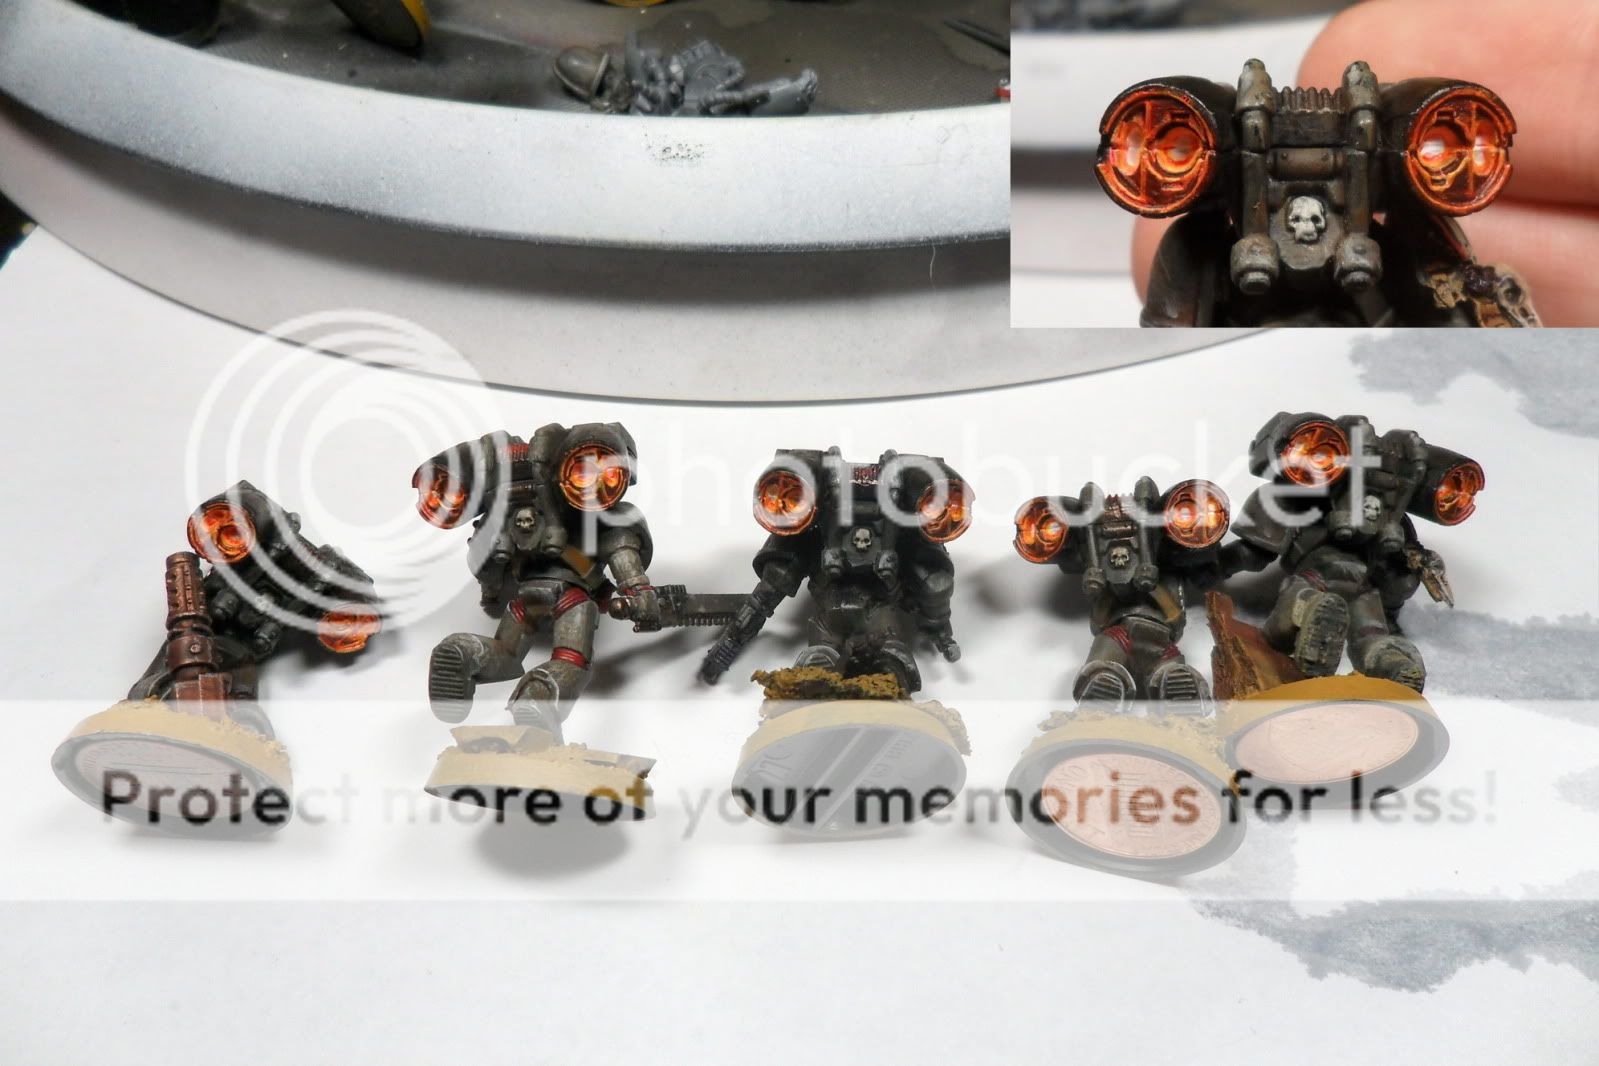
I go back over some of the edges with yellow again.

I decided the red wasn't heavy enough, so I apply another red ink layer to certain spots away from the edges and touch up the white sources.
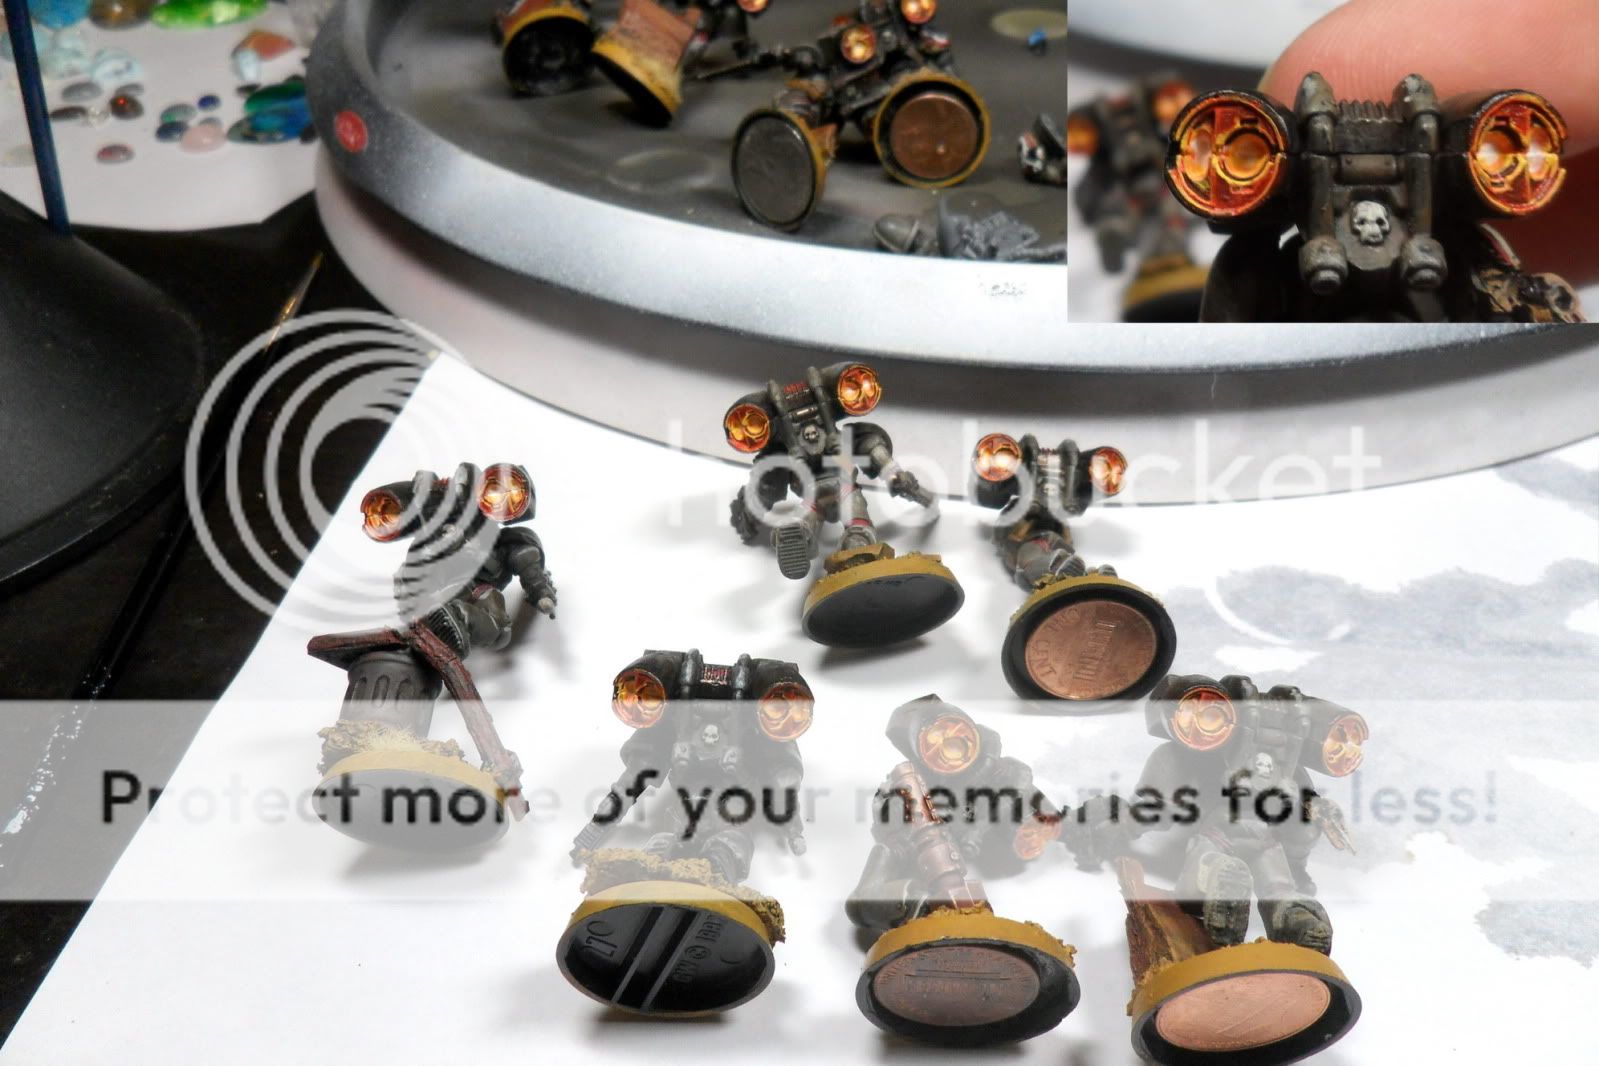
There you go! This is a good way to get used to simple source lighting. You can see that my powerfist/thunderhammers follow a similar lighting feel. My other power weapons follow a slightly different style, relying more on lava texture and gradient.
______________________________________________


.jpeg)


Great effect and thanks for the tutorial!
ReplyDeleteI'm totally stealing your thrusters formula. Because that's what friends are for!
ReplyDeleteNo! THIEF! However did you find my formula? *looks above*
ReplyDeleteOh yeah, go right ahead. :)
Glad you guys like it. Only 15 more jump packs to go...
I tried it out on my deathwatch marine while he was riding a bike for the night. Mine wasn't as striking but maybe i can see you do one next time you come to play.
ReplyDeleteThen again i only have the GW paints and old inks to work with.
ReplyDeleteThe key to striking lighting effects is contrasting shadows and intense colors on the light. Things which block view to the light source are shaded. In the case of the jump packs, its mostly seen in the black rings inside the thruster, and techinically the burnt outer area also serves this effect too.
ReplyDeleteIntensity is gained from starting with that white basecoat on the areas that would be bathed in light, and by using watered down inks to keep the intensity up. I dunno about the older inks though, it may be dulling it instead. But true inks should saturate, compared to washes which dull.
At this stage, its a back and forth between red saturating and edge highlighting:
inking with red to saturate, then relining with yellows to make it look very sharply highlighted, then fixing the source point white, then going back if it needs more saturation.